Create and schedule appointments
About scheduling appointments
With Square Appointments, you can create and schedule appointments for your clients and send them a text or email notification.
Before you begin
You can schedule appointments for a specific time, all day, or recurring. Before you can schedule appointments, you need to do the following:
Set up Square Appointments. Learn how to set up your health & beauty business with Square.
Create services. Learn how to create and manage a service with Square Appointments.
Set up your staff. Learn how to add and manage bookable staff for Square Appointments.
You have three options for scheduling appointments:
Schedule appointments from your Square Dashboard
Schedule appointments from your Square Appointments POS app
Schedule appointments with Square Messages
Before you can schedule appointments with Square Messages, you need to set up Square Messages. Learn how to set up and manage Square Messages.
Option 1: Schedule an appointment from Square Dashboard
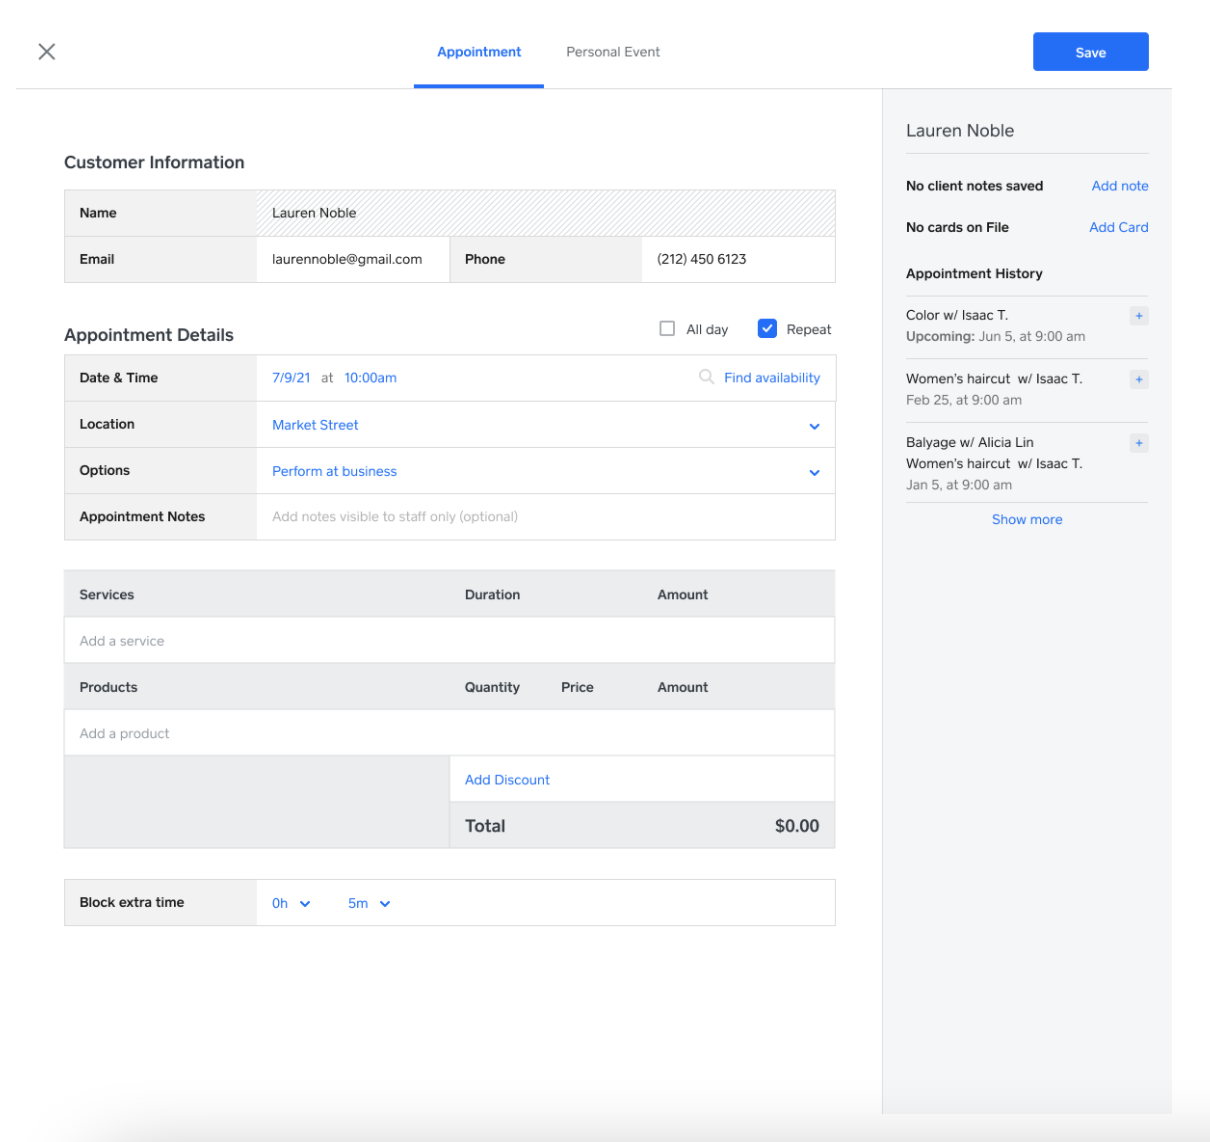
Sign in to your Square Dashboard and click Appointments or Payments > Appointments.
Click Calendar.
Select a timeslot on your calendar or click Create.
Choose the Appointment event type.
Schedule an appointment and include details such as client contact information, appointment location, notes, or add a Card on File for your client. All client information is saved to your customer directory.
Add services and items. Note: If any service that’s part of a multiple service appointment has blocked off time configured, a Block extra time option will appear as the last step in the appointment. You can adjust the blocked off time as needed or set it to None to remove it completely. If you try to book over an existing appointment, you’ll see a notification warning you before you double-book.
Once a service is added, you can click Find availability to open a side window for selecting date and time slots where you have open availability.
Click Save.
Click Notification Type to select if and how you’d like to notify your customer. You can add an optional message to your client.
Click Save.
Option 2: Schedule an appointment from the Square Appointments POS app
Open your Square Appointments POS app.
Tap Calendar.
Tap + or tap a time slot from your calendar and select Create Appointment.
Add an existing customer by searching for their name, email or phone number or create a new Customer Profile.
Add the services and optional items.
Tap the service/item to select the staff performing the service.
Add an optional contract or internal note for your staff.
Tap Save.
Tap Notification Type to select if and how you’d like to notify your customer. You can add an optional message to your client.
Tap Save.
Option 3: Schedule an appointment from Square Messages
- Sign in to your Square Dashboard and click the messages icon to open your inbox. You can also click More from Square > Messages.
- Open a conversation and click +.
- Select Appointment.
- Add the appointment information.
- Click Save.
- Click Notification Type to select if and how you’d like to notify your customer. You can add an optional message to your client.
- Click Save.