Clothing and accessories

Grocery and convenience

Home goods and furniture

Wine and liquor

Everyone else
What is a retail POS system?
Payments, inventory, and eCommerce are just the start. The Square for Retail POS is your smart partner to connect every tool that keeps your business moving — so you can shape what’s next.
Explore for your business ->

Built to simplify your day-to-day
When you have too many tasks and not enough time, find ways to increase your productivity with best-in-class POS software.
Take fast payments anywhere
Accept every major payment type, including Afterpay, in store, and online. Plus take payments with Tap to Pay on iPhone. All of your sales are automatically tracked in one place.
Accept returns and exchanges
Accept returns at any location and seamlessly process exchanges.
Sell online
Set up a professional Square Online eCommerce site and customize it with design themes or integrate your existing website.
Tailor-made for all types of retailers
Whether you’re a small business or a big brand, the Square for Retail POS is flexible for how you work.
Retailers who love Square
Why retailers choose Square
“Upgrading to Square for Retail was a huge help in keeping track of inventory and reports. It’s made us smarter and more efficient business owners.”
— Gary & Logan, Collins & Coupe (Home Goods)
See what other Square retailers have to say
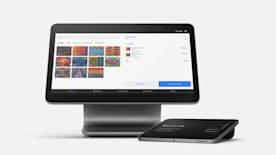
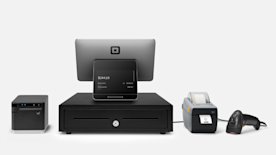
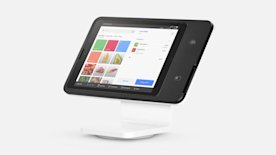
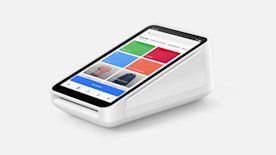
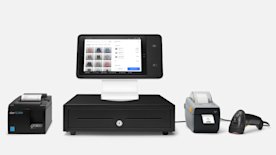
Hardware for every place you need it
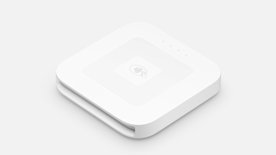
Build your perfect package of POS hardware that’s easy to use and always in sync.
Pick the plan that fits you best
Get a 30-day free trial of Plus when you sign up for Square for Retail. After the trial, you can pick the software plan that’s best for you.
- Free
- Plus
- Premium
Free
For small businesses getting started in person and online
$0
No monthly fees
Standout features:
- Issue exchanges
- Auto-create items
- Standard inventory tools
Processing rates per transaction:
2.6% + 15 cents (in person)
2.9% + 30 cents (online)
3.5% + 15 cents (manually entered)
3.3% + 30 cents (invoices)
6% + 30 cents (Afterpay)
Plus
For growing retail businesses that need in-depth features
$89
Per month, per location
Standout features:
- Issue exchanges
- Auto-create items
- Advanced inventory tools
- Print barcode labels
- Create purchase orders
- Manage vendors
- 24/7 phone support
Processing rates per transaction:
Discount: 2.5% + 10 cents (in person)1
2.9% + 30 cents (online)
3.5% + 15 cents (manually entered)
3.3% + 30 cents (invoices)
6% + 30 cents (Afterpay)
Premium
For established retail businesses looking to scale
Custom
Must meet eligibility requirements2
Standout features:
Everything in the Plus plan, and
- One-on-one onboarding support
- Discounts on Square add-ons like Square Payroll, Square Loyalty, and Square Marketing
Custom processing rates available.
How to get started
Need support? Talk to our team
Sync your catalog and existing apps
Import your inventory in seconds or scan new items to build your catalog. Then, integrate your third-party apps so everything works together seamlessly.
Start selling
Reach customers in store, online, or on the go, and track every sale from your integrated POS system.
Stay up to date.
Learn about features and promotions and hear stories from other retail businesses and our experts.
Nice to meet you.
We think businesses are as unique as the people who run them. Get individualized content on the topics you care about most by telling us a little more about yourself.
FAQ
Square for Retail is a comprehensive, all-in-one POS solution designed specifically for retail businesses. Square for Retail builds on features from the standard Square Point of Sale and includes advanced functionality to help retailers run their business more efficiently.
Compare Square Point of Sale and Square for Retail Free and Plus plans to find the best POS solution for your business.
It’s simple and fast to sign up for Square for Retail. If you currently use Lightspeed Retail, Shopify POS, or another similar retail POS system, Square for Retail will likely fit your needs with a user-friendly interface. Just select your plan, sign up, and import your inventory. You can easily transfer your existing inventory with bulk intake importing.
You can rely on transparent pricing and no long-term contracts. And if you need help, Square Support is here for you.
You can upgrade from the Free Retail plan to the Plus plan by subscribing to it here. You’ll be able to utilize all existing features, and you’ll only have to set up the added functionality included with your upgrade. After your 30-day free trial, you’ll be given the option to pick your plan. If you don’t choose one, you’ll automatically be downgraded to the Free Retail plan.
To upgrade to the custom Premium plan, contact our sales team.
You always have the option to downgrade your subscription from Plus to Free in your Dashboard. When you downgrade, you’ll see messaging in your Dashboard letting you know which features you’ll lose, like certain smart inventory management features, multi-location stock management, and barcode label printing. You can see and compare plan features on our pricing page.
You can also pause your subscription at any time from your Dashboard. When you pause a subscription, you will not be billed. You can unpause at any time and your account will be ready for you without losing your past data.
1The rate of 2.5% + 10¢ for in-person payments is only applicable to payments processed when signed into a Square for Retail Plus account on the Retail POS.
2Custom pricing may be available if you process more than $250K per year. Discounts on optional add-ons. Eligibility required. Contact sales


