Schedule Appointments with Multiple Staff Members
Your clients can book a single appointment with your business that contains multiple services assigned to different staff members. Assigned services will show up on that staff’s calendar, and tips will be allocated accordingly to each assigned staff member.
Enable appointment booking with multiple staff members
Navigate to your Appointments Dashboard.
Select Create Appointment.
Enter the client’s information, as well as the date and time of the appointment.
Select Add a service, and enter the desired service.
In the pop-up window, click on a staff member to change the default staff selected. A dropdown will appear where you can select a different staff member.
Click Save to save your changes.
Note: If you’re double-booking a staff member, we’ll alert you when you attempt to save the second assigned service.
Turn off the ability to book appointments with multiple staff members
Navigate to your Appointments Dashboard> Settings > Calendar & Booking.
Toggle off Allow multiple staff to be booked in a single appointment.
Note: Disabling this feature does not prevent you or your staff members from manually creating appointments with multiple assigned staff on behalf of the client.
Assign items to a staff member
If your business also sells items, such as hair products for a beauty salon, you may want to attribute the sale of an item to the front desk staff, or another staff member, and not the individual who performed the service. You can assign items to a specific staff member from your Appointment dashboard or your Appointments app.
From your Appointments dashboard
Locate the appointment in your Appointments Dashboard, or create a new appointment.
Click Add an item, and add your desired item.
Change the staff member by selecting the dropdown menu, and click Save.
Select Take Payment if you’re recording cash, cheque or another payment type, using the client’s card on file, or typing in the card details manually for a card-not-present transaction.
From your Appointments app
Locate the appointment in your Appointments app.
Tap Add Item or Discount, and add your desired item.
Once you add an item to the cart, click on the item to change the default assigned staff, then tap Save. Repeat as required for any additional items. Tap Save when you’re finished.
Tap Review and Check Out to process the transaction using your Square payment device.
Reporting
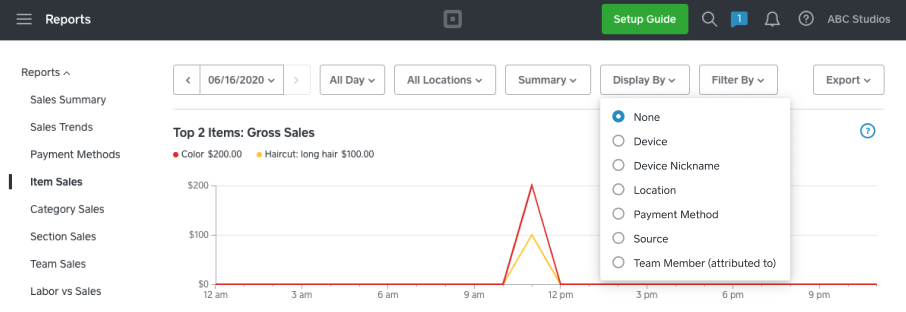
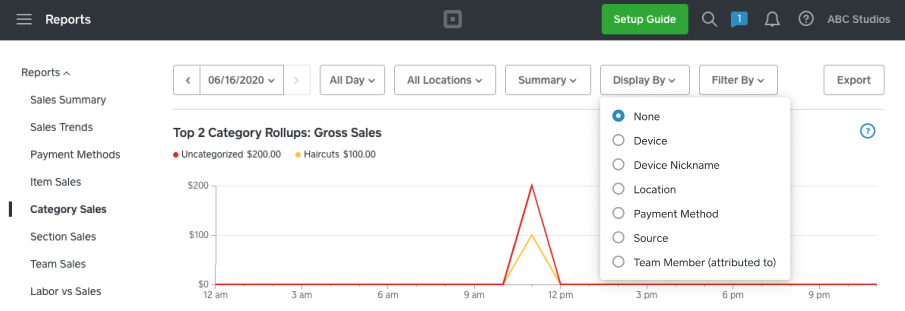
From the Item Sales and Category Sales report, you can view which staff member was attributed to the item or service performed.
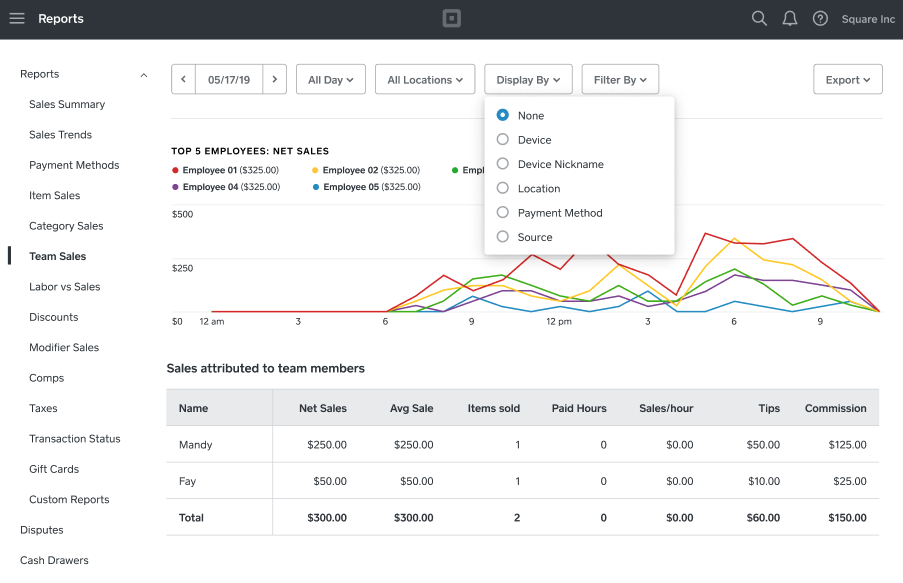
The Team Sales report calculates based on staff attribution to the item or service (i.e. the staff member who was assigned to perform the service or to the item). Any tips earned on a multi-staff appointment reflect a percentage split proportionally among the staff based on the total cost of the client’s appointment.


Tipping Breakdown
When a client books multiple services or purchases multiple items from you, they may decide to leave a tip at the end of the appointment. Review the following example to understand how we split the tips proportionally.
Sally books a facial ($30) and a massage ($60).
The facial is assigned to Staff A, and the massage is assigned to Staff B.
At the end of the appointment, Sally decides to purchase an item ($10), and Staff C cashes out the appointment at a total of $100.
Sally leaves a $10 tip.
Staff A receives $3 in tips, Staff B receives $6 in tips and Staff C receives $1 in tips.
If Sally decides not to tip one of the three staff members, you’ll have to split the appointment into two or three transactions. This is a current limitation, but may change in the future.